Rei Vilo's fischertechnik Corner
  • About
  • Blog
  • Reviews
    • How to Start?
    • Controllers >
      • Robotics TXT
      • TXT 4.0 Controller
      • Bluetooth Smart Beginner Set
      • Interface Boards for fischertechnik Models
      • Didacta Advance Pi-F5 interface board
    • Sets >
      • Technical Revolutions Set
      • Pneumatic Power Set
      • Automation Robots Set
      • Electro-Pneumatic Set
      • Starter Set for micro:bit
      • Bluetooth Smart Beginner Set
      • Robotics TXT Smart Home Set
    • Exploring the Lego World >
      • Purchasing
      • Unboxing
      • Installing
      • Building
      • Programming
      • Connecting
      • Playing
      • Expanding
      • Concluding
  • Models
    • Back to the 70's
    • Micro Models
    • New Magasin >
      • Magasin releases 1, 2 and 3
      • Long X-Axis
      • Moving Desk And Y-Axis
      • Compressed Air And Vacuum For Z-Axis
      • Pictures
      • Specifications
    • Power Saving White LED
    • Flipper with I²C LCD Panel
    • Celebrating 50 Years!
    • ft Convention 2013
    • ft Convention 2014
  • Sensors
    • Interfacing an Arduino to a Robo TX Controller >
      • Analog Interface
      • Digital Interface
      • I²C Interface
    • Standard Sensors >
      • Playing With Accelerometers
      • Proximity Sensor
      • Pressure Sensor
    • Advanced Sensors >
      • Industrial Colour Reader
      • Stepper Motor Controller
      • DC-Motor with Quadrature Encoder Controller
    • smartDevices >
      • smartColours
      • smartRFID
      • smartLED
      • smartHub
      • smartControls
      • smartMeter
      • smartCamera
      • smartNewCamera
      • smartWiFi
      • smartBLE
      • smartNode
      • smartIMU
  • RoboPro
    • Value Operations >
      • Min and Max Functions
      • Signal Management With Median
      • Modulo Function
      • Map Function
    • Standard Modules >
      • Software Managed Compressor
      • Self-Calibrated Colour-Reader
      • Standard Conveyor Belt Routine
      • Management Panel
      • Encoder-Motor Position Management
    • Variable Types >
      • CSV List Management
      • Queue Function
    • Program Structures >
      • Parallel Processing
      • Multi-Tasking End Management Procedure
    • Tutorials >
      • Setting Bluetooth LAN with Multiple TX-Cs
      • Dealing with Very Large Models >
        • Getting a General View
        • Defining User's Functions
        • Elaborating the Modelisation
        • Defining the Processes
        • Setting the Messages
        • Going Further
        • References
      • Program Error 2 Message
  • I²C
    • How to Connect an I²C Device to the Robo TX?
    • How to Connect an I²C Device to the Robotics TXT?
    • How to Manage an I²C Device?
    • How to Use an I²C Driver?
    • List of I²C Drivers for Sensors >
      • I²C Real Time Clock DS1307
      • I²C LCD screen 4 lines of 20 characters LCD03
      • I²C Triple Axis Accelerometer ADXL345
      • I²C Red-Green-Blue LED BlinkM
      • I²C Two Axis Compass HMC6352
      • I²C Triple Axis Magnetometer HMC5843
      • I²C True Colour Sensor ADJD-S371
      • I²C Stepper Controller AMIS-30624
    • List of I²C Drivers for smartDevices >
      • I²C True Colours Smart Sensor smartColours
      • I²C RFID Smart Sensor smartRFID
      • I²C 4-Digit 7-Segment LED Display smartLED
      • I²C Screen With Touch and SD-Card smartControls
      • I²C Smart Sensor smartCamera
      • I²C Smart Sensor smartNewCamera
      • I²C Remote WiFi Interface smartWiFi​
      • I²C Remote Bluetooth Interface smartBLE​
      • I²C Remote Interface smartNode​
      • I²C New LCD Screen 4 x 20 characters smartLCD
      • I²C Inertial Measurement Unit smartIMU

smartRFID

As the first smart sensor, smartColours, is close to completion, I'm starting a new project called smartRFID.

RFID stands for Radio-Frequency IDentification (reference). RFID is used everywhere: price tags on the department stores, contact-less keys for cars, clocking cards at offices...

There are various kinds of RFID tags, with different operating frequencies —most common are 125 KHz or 13,56 MHz—, features —read-only or  write-and-read—, operating distance from which it can be read —from 1 cm up to 100 m— and formats —from very small as capsule, button, up to classic credit card form-factor. 

The RFID system consists on a reader and one or more tags. Both the reader and the tag are two-way radio transmitter-receivers. The reader sends a signal to the tag, and the tag sends its unique identifier back. The tag doesn't require a battery, as its antenna takes the energy from the radio waves and powers the micro-chip (reference).

The idea is to use RFID tags, for example to identify boxes.
Photo
Please note the RIFD readers used for the smartRFID module are deprecated and no longer available. 

Functional Description

The goal is to read RFID tags. 

I selected a basic RFID tag, read-only, which provides a unique combination of 5 bytes plus 1 byte for checksum validation. Five bytes —or 40 bits— provide 1 099 511 627 776 unique combinations!

As for the colours, reading any and all RFID tags is possible, but identifying the tags currently used seems more useful. Instead of a lengthy identification sequence, I prefer to deal with just a number. So the RFID unique combination with 5 bytes needs to be translated into a single digit number. This will be done by a table.

Operating distance should be consistent with the scale of fischertechnik models. An operating distance between 2 and 4 cm seems convenient.

The sensor would be connected through I²C to the Robo TX controller and should fit into a 30 x 30 x 30 yellow box (references 38287 and 38440).
Photo

Commands

There are only two main commands:
  • smRFID_begin initialises the sensor and returns an error if the sensor is not available.
  • smRFID_read reads the unique identifier of the RFID tag if one tag is available and proceeds to the checksum validation; returns an error if no tag is available or if the checksum is not valid.

The following commands provide a more advanced usage. Instead of dealing with a lengthy RFID unique identifier with 5 bytes, smRFID_identify read the 5 bytes RFID tag, controls the check-sum and returns a single digit number:
  • smRFID_identify reads the unique identifier of the RFID tag if one tag is available and provides the associated number; otherwise returns an error.
  • smRFID_translate translates the unique RFID identifier into a single digit number. This table is hard coded and edited on Robo Pro.
  • smRFID_test tests the connection.


The commands are detailed here.
Photo

Prototype

Contrary the the smartColours sensor, the RFID reader comes ready to use. 

Only a protocol adapter with logic level converter is required. So there's no need for a prototype!

Finalised and Working Sensor

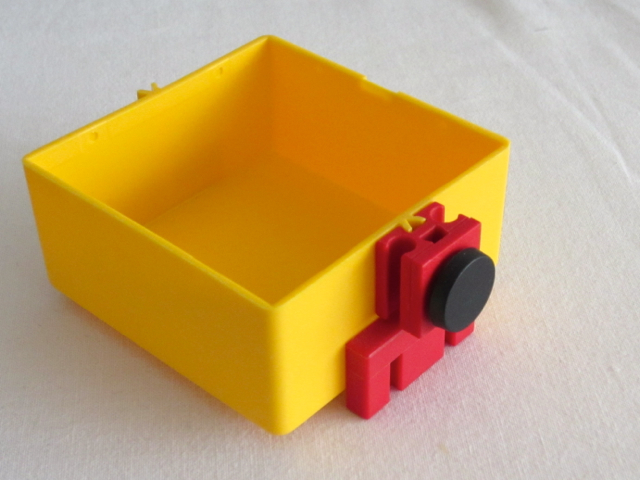
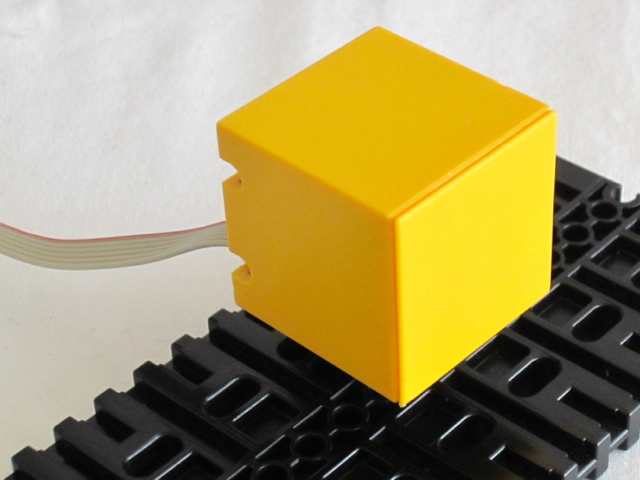
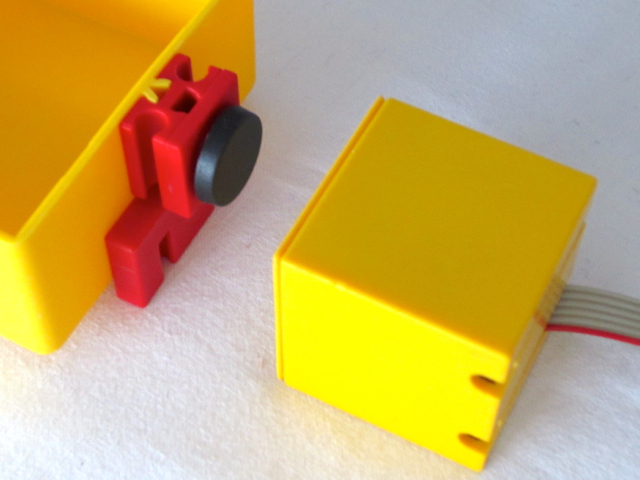
The sensor fits into a 3 x 3 x 3 cm yellow box.

First tests allow the RFID tags to be read at 3 cm.

This is consistent with the scale of fischertechnik models.
Photo
Posted: 22 Oct 2011
Updated: 15 Jan 2020
Powered by Create your own unique website with customizable templates.